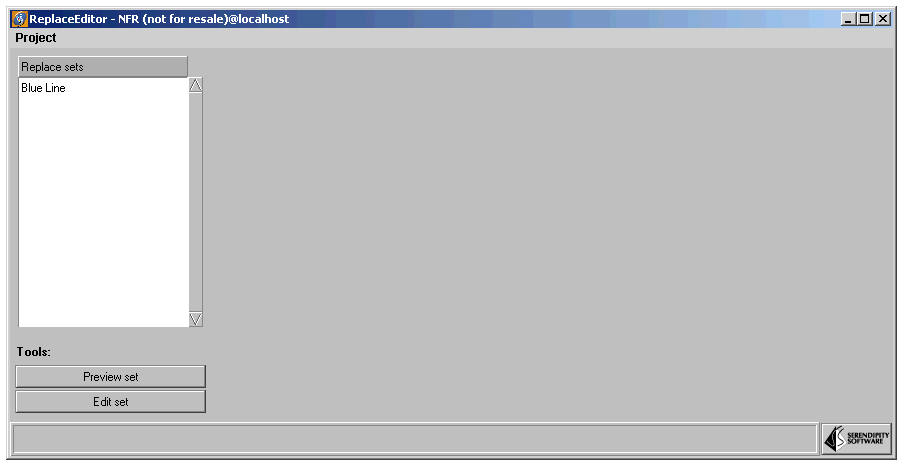
There have been a few changes to the Replace Editor giving more functionality and ease of use. You still have all of the old functions but the look, feel and method has been changed to accommodate the new features. These include exact and partial matching of specials and direct editing of colour values instead of having to drag them into the Swatch Editor. The other advantage is that you can have a replace set enabled per pagesetup instead of system wide as you do with System Specials. See Replace Editor Tips.
When you start the Replace Editor you will immediately see there are some changes.
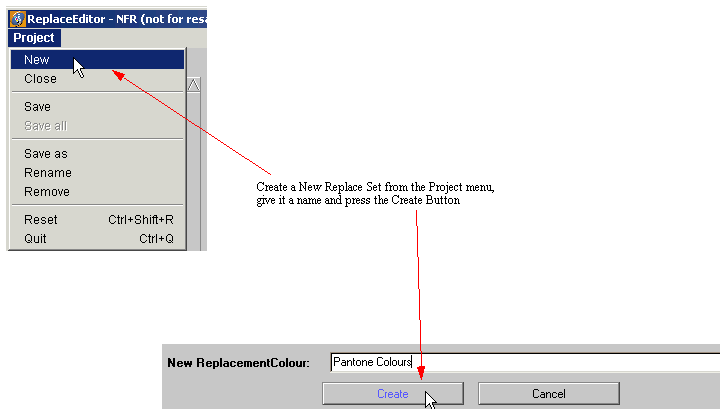
Select the Replace Editor from the Launch Pad and create a New Replace Set. (You will see the Blue line already there along with any other replace sets that you have already created.)
Once you have done this you will see all the different options that are available to you.
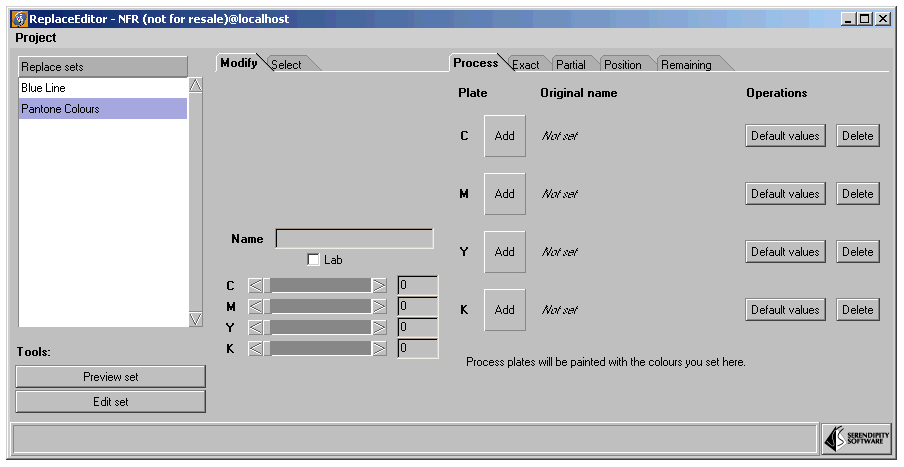
We will look at the configuration by creating a replace set for the CMYK first which would be used to account for hue errors in inks. This is done from the "Process" tab. We will then continuing showing examples of the other tabs.
With the initial set that we have created, there is nothing to edit and nothing to preview. To create a CMYK replacement for hue errors, make sure that you have selected "Edit set" and the "Process" tab is showing (as shown above). You can either click on the "Add" button next to the colour, or click on the "Default values" button.
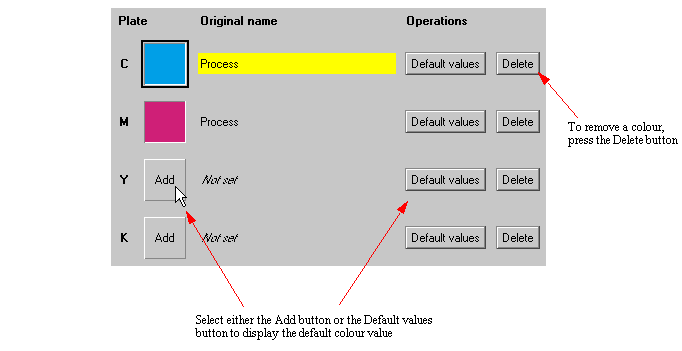
Once you have all of the colours filled in, you can select each one in turn by selecting the colour next to the plate initial. This will place the colour in the editing panel and the values for it in the CMYK sliding controls
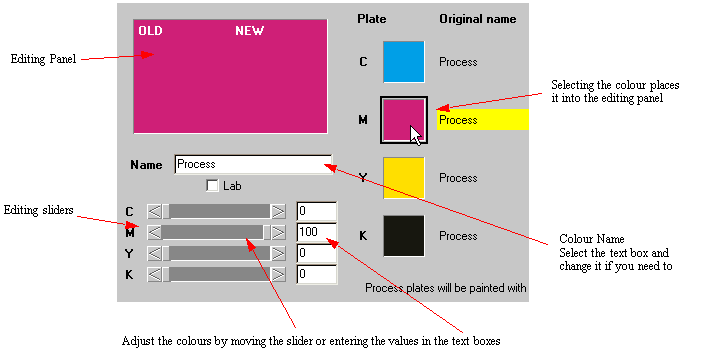
Adjust the colours to the desired values. Repeat for each colour that you wish to change and save the set from the "Project" menu.
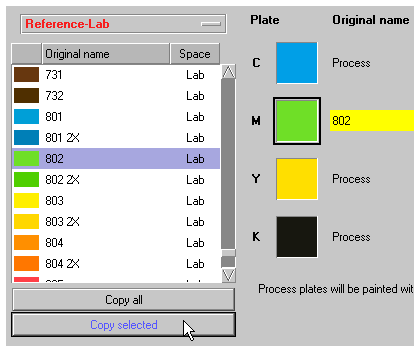
You can also replace the Process colours with any other colour you wish. This can be done by either selecting the default values and adjusting them as shown above, or by selecting a colour from our reference library or another set.
Once you have you list, select the colour that you want to replace. i.e. C,M,Y or K. Then select the colour that you want to copy and press the copy selected. This places the colour into the selected location.
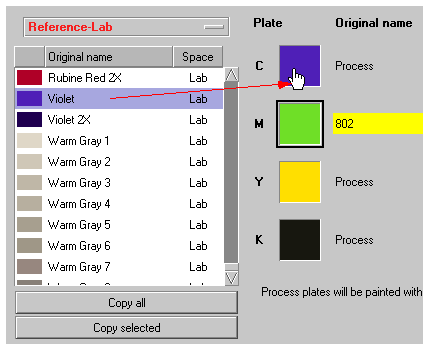
You can also select a reference colour from the list and drag the colour over the top of the plate box. As you move over the box you will see the plate colour change to the one you are dragging.
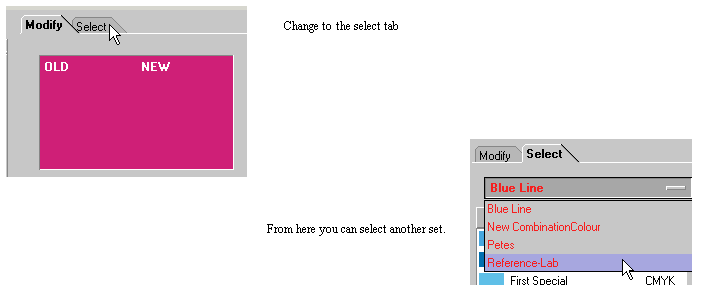
Changing back to the modify tab allows you edit the colours that you have copied in the same way as we did previously. The copying and editing process works the same for all the other tabs. We will look at the functionality of these tabs.
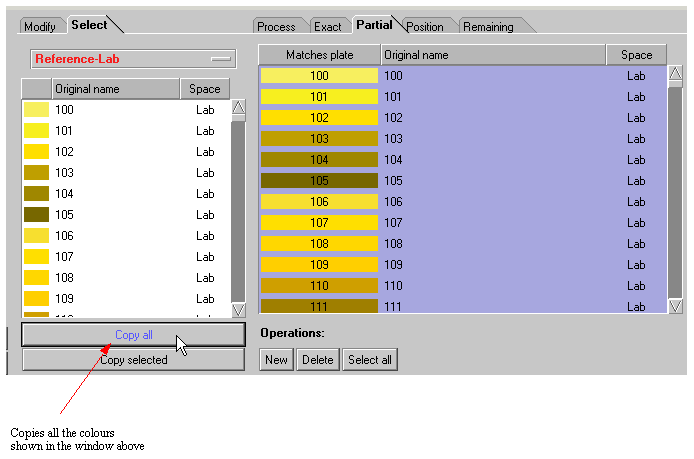
Both of these two tabs work in the same manner. The difference is that one will match the name exactly and the other will only need a partial name match. From the Select tab on the left side, select a set that you want to add. Make sure that you have the exact or partial tab showing and press the "copy all" button to copy all of the set into either the exact or partial windows. You can still edit these by hand if you wish using the same method as described earlier.
The picture below shows the how the position works by looking at the Blue Line reference set. This has not changed in operation, just appearance.
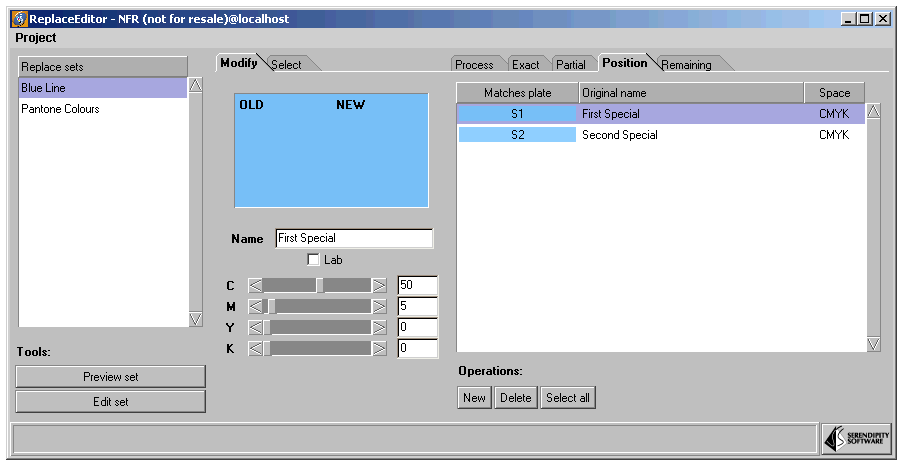
Here you can see that the first special as indicated by the letter S1 (not the name) is going to be used to replace the first special plate. You can see from the editing panel the values of Cyan and Magenta that are used. You can create your own colours by clicking the "New" button and changing the colours.
The remaining special colours will be replaced by the colour that is defined in the last tab. Again, we are showing the Blue Line for our example.
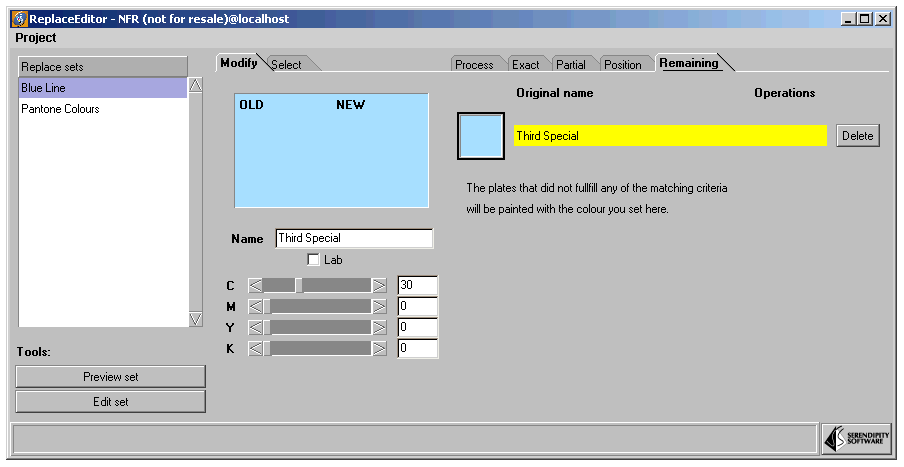
If you do not want this you can delete the colour by pressing the Delete button. You add and create colours in the same way as you we did in the process tab. See Process